Quick Tip: Setting Up PitchVision Coach Software on Your PC
Here's a super quick guide to setting up PitchVision Coach on your PC. It's quick because it's easy! You simply need to know three things; who is using it, where are you, and what you are doing.
We call these things; players, venues and sessions.
Let's assume you are setting up everything from scratch for now.
(In reality, most of this stuff only needs to be set up once and then you will just reuse it.)
Setting up the venue
In PitchVision terms, the "venue" is where you are. Most of the time it will be set up where you use it, but if you are in a new place you need to add a new venue.
It could be an indoor school, an outdoor net, or anywhere you can use the tools (we have seen it in diverse places like tennis courts and playgrounds). It doesn't matter the exact details of the location, but you do need to tell PitchVision where the sensors are.
So, open up your PVC app on your Windows PC and click on Setup, then Venues:

From the Venue Setup window, click New to fill in the details. The screen looks like this:

Type in the venue name. This can be anything you want.
Leave the Crease Mat Position box at 0.00*
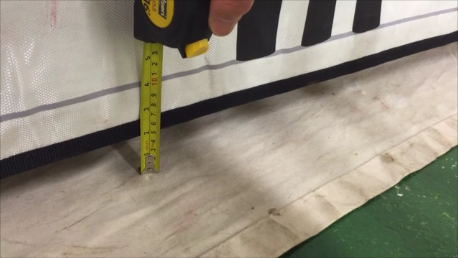
Before you enter the Pitch Mat Position details, measure the distance between the edge of the mat and the stumps with a tape measure:

This can be any distance you like, although we recommend the "standard" distance in the settings at 2.90m. This gives clearance if the batsman wants to step down the pitch.
If the distance is 2.90m you don't need to change the setting.
If it's anywhere else - for example right up to the stumps for yorker practice without a batsman - change the drop down menu to User Defined and enter the distance you measured (in metres) from the stumps.

Finally, measure the distance from the stumps to the Back Wall Mat, and the height of the mat from the floor. If you don't have a back wall you can still use PitchVision, just leaving this section blank.

Enter the distance to the stumps and the height of the mat in the last two sections.
Click on Save, then close the window with the "x" on the right.
The venue is set up.
If you need to amend the details because something changes in future, then you can go back and edit as much as you like.
Setting up the players
Players are anyone who will be using the system. It's important to set them up so they can view their videos and data after the session. However, once someone is set up, they will remain on the system. You only need to do it once. You can add players any time.
To set up a player, go to Setup then Player Management.

Click New to set up a new player (you can also make changes to existing players here).
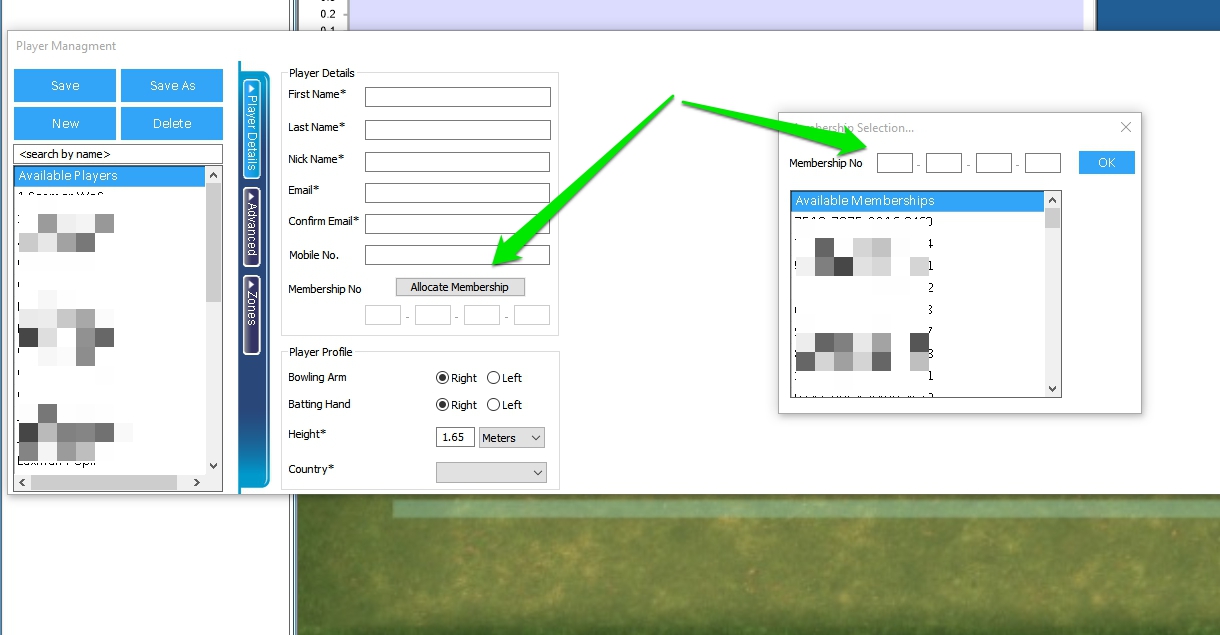
Enter the player details, these are:

- First Name
- Surname
- Nickname (for the system)
- Email address
- Height (this helps with calculating bowling pace)
- Country
You also need to enter the membership number. To do this, click on Allocate Membership and double click on a membership number from the list.
For now, ignore the Advanced and Zones sections. As with everything here, you can come back later once the basics are done.
Instead, click Save to save the player on the system.
You can add as many players as you wish. They don't need to be at your next session. Once you have set up all the players you want, use the "x" to close the window.
Getting ready for a session
A session is a net or coaching session run at your venue with your players. Most sessions are run with a batsman and a few bowlers, but you can run it any way your creativity takes you! You can set up a session any time in advance of it starting from 2 minutes to... well... no upper limit.
Before we get excited, however you run the session, it's always set up like this; go to Setup and Session Management.
The left hand side is a list of all your sessions. Click on New.
Enter a name in "session name". It's useful to name these in a unique way so you can get back to them to review later.
Then choose the venue from the drop down list of options.
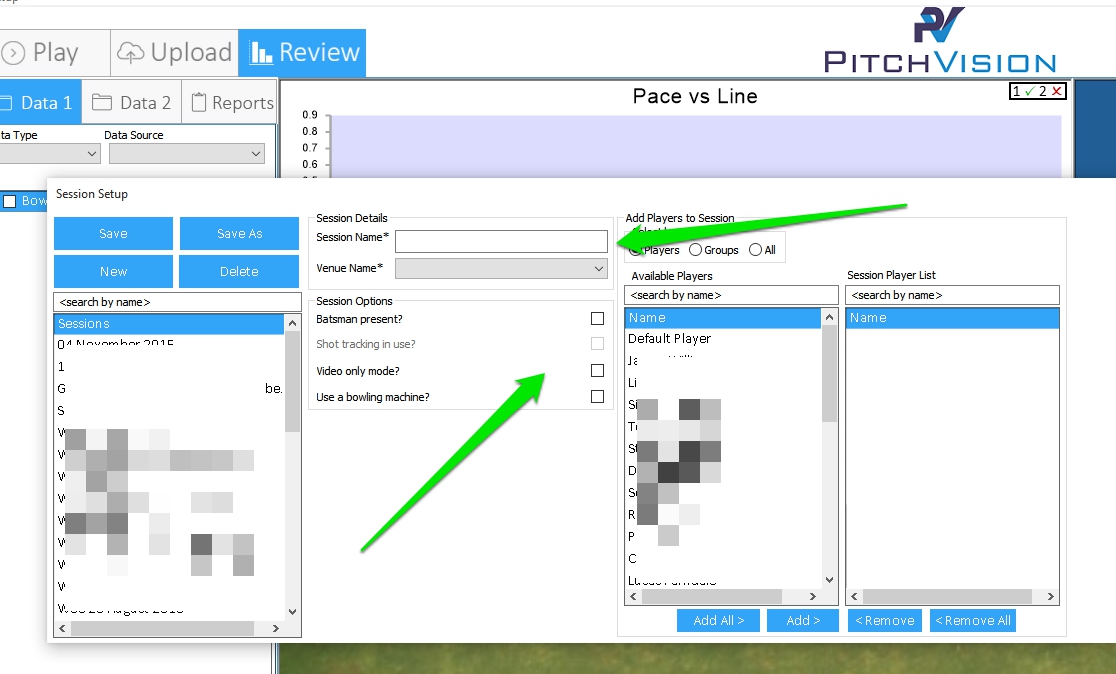
PitchVision is flexible to deal with different kinds of sessions, so there are a few options to decide on. Make sure you know roughly what kind of session it is (bowling machine, bowlers, batsmen). Then, under Session Options do the following;
- If a batsman is in the net, tick "Batsman Present?". Otherwise leave it unticked.
- Do not tick "Shot tracking in use?"*
- Do not tick "Video only mode?"*
- If you are using a bowling machine and not bowlers, tick "Use a bowling machine?". If there are bowlers, leave it unticked.
If you get any of this wrong or change your mind, you can amend the options any time, even during the session.
On the right are two columns. One has all your players in it, the other is empty so you can add only the players who will be at the session. Add players by clicking the the name, then click "Add". You can add everyone if they are all coming by clicking "Add All". If you make a mistake or someone doesn't turn up then you can remove them with the "Remove" button.
Once the options and players are ready, click Save on the left and close the window with the "x".
You're ready!
So, everything is now setup and ready for your session:
- Venue
- Players
- Session
When the players arrive you can start using the system right away. If you need to make changes to anything, you can pause the session and go back into the sections before continuing. But really, most of the time all you need to do is coach and let the players play.
As you can imagine, if you run another session the next week with the same players at the same venue, all you have to do it create a new session and keep the venue and players from last time. It's designed to be as simple as possible.
*There are some exceptions to this rule, but for now you don't have to worry about it.
- Login to post comments
